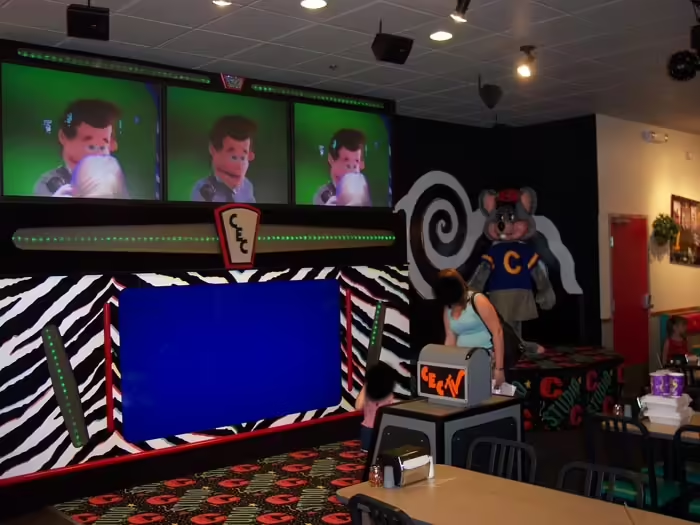
Uncle Klunk Installation Tape
Used In
Transcript
[Klunk Pre-installation]
Narrator:
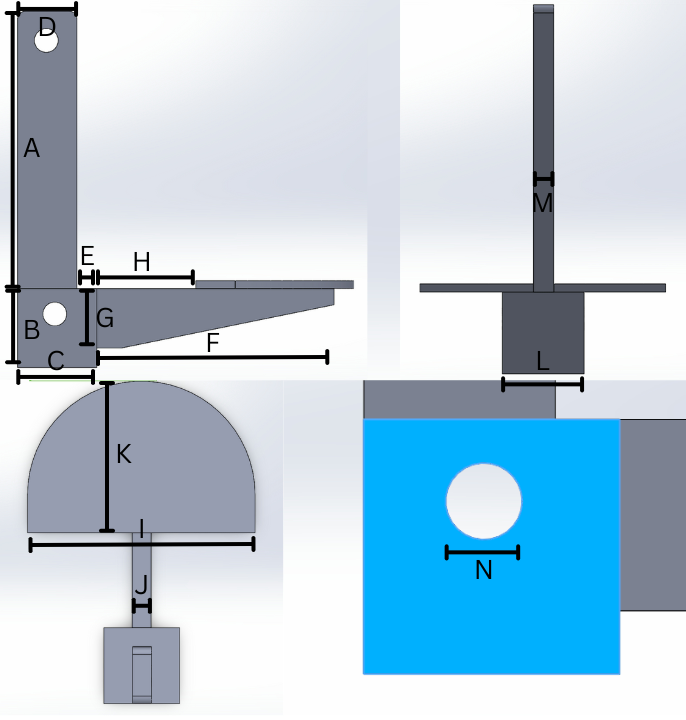
Welcome to the installation of Uncle Klunk. This part will deal with the stage preparation, we call it the preinstallation of Klunk. Later on after the stage has been prepared, you will begin the actual installation process. Before you begin the preinstallation of Uncle Klunk it is important that you take inventory of all the items you have received for the preinstallation. If you haven’t yet taken inventory, do it now. Use the preinstallation shipment package list, contained in the printed preinstallation instructions, and check off the inventoried items as you go. If you are missing any of the items or hardware needed for the preinstallation you should call Fred Quinlan at Creative Engineering Incorporated. His telephone number is area code 305-841-7900. If you are missing any parts, make that call now. All right, we will begin the preinstallation of Uncle Klunk. As you know Uncle Klunk will be installed where Rolfe and Earle have been performing, the stage to the left as you face the performers from the front. Begin by dismantling the Rolfe and Earle set. Remove the crash cymbal and stand from the stage, do that by unscrewing the hardware holding the cymbal and stand to the stage floor. Now tape the hardware you have removed to the cymbal and carefully box it off for storage. As you remove materials from the Rolfe and Earle set they should be carefully protected for storage. Now remove Rolfe and Earle’s costume. begin by carefully taking off their masks. Now remove Rolfe’s feet, body fur, and hands. After removing Rolfe and Earl’s costume, air down the show, open the trap door, and disconnect the main airline to Rolfe’s valve bank at the T fitting and also at the oiler. You may have to split the air hose with an exacto knife or a razor blade at both locations to get it to separate easily. Now unbolt the quick disconnect on Rolfe’s valve bank. Use two 7/16 inch wrenches to unbolt those quick disconnects. Now be careful not to dislodge and lose the o-rings when you separate those parts. As you proceed be sure to save all the nuts, bolts, flat washers, and lock washers. Also take this opportunity to take the ends of and then to wire tie Rolfe’s character cable to the underside of the stage. Remove Rolfe’s valve bank from under the stage by pulling it up through the trapdoor. You will need to get an assistant to help you with the next step, crawl under the stage and pass Rolfe’s plumbing harness up and out of the stage through the small hole behind Rolfe’s foot. You will have to fold the quick disconnect parallel to the air lines to get it through that hole. Now the quick disconnect may not look as though it will fit through the hole but once it is folded parallel to the air lines it will. Now it’s time to unbolt and remove Rolfe from the stage, it is important that you have someone hold Rolfe while you unbolt his footplates. The bolts holding the footplates are located under the stage so you may need to have someone there as well. Make sure your assistant is holding Rolfe and Earle otherwise he could take a dive into your dining room and be sure to save all the nuts and bolts and washers. After Uncle Klunk is installed you can use his wood dolly, which has been pre-drilled with t-nuts, to bolt Rolfe and roll onto. This will allow Rolfe to be secure enough so you may make any necessary repairs on him. Once unbolted, carry Rolfe and Earle carefully off the stage and into your tech room, secure him against the wall until Uncle Klunk’s wood dolly becomes available. Now remove the rainbow from the stage. You do that by unscrewing the L brackets from the rear of the rainbow and from the stage itself. When you’ve done that, carry the rainbow off the stage for storage. Now it’s important to wrap the rainbow in paper in order to keep it from becoming scratched and the hardware should be taped to the brackets. The two pair of red and yellow floodlights positioned behind the rainbow should be removed next. Again be sure to tape all hardware to light fixtures and box them for protection and storage. Your carpet has probably gotten a little dirty from all the work we’ve been doing so this would be a good time to vacuum it. When you have completed the vacuuming remove all the staples from your carpet and gradually pull it up off the floor slowly and carefully. Now the carpet will be used again when Rolfe goes back on stage. Roll the carpet up after you have removed all those staples and prepare it for storage. Now is the time to remove any protruding objects from the stage floor, this will ensure a flat clean surface for the new carpet. Now take an inventory of all the props removed so far: the crash symbol and its hardware. The costumes: mask, feet, hands, body fur, and drumstick. Rolfe’s mounting hardware. The flood lights: the two yellow and the two red with their hardware. The rainbow with its L brackets and hardware. And the carpet. All of these items are now ready for storage. For the next step it’s important for you to find the back wall center line, use a tape measure and measure from the break of the wall by the stage right drape m If you have any questions refer to drawing 1a in the printed instructions. When you find the center line mark it. Now be sure to save the lumber packed inside of your new carpet. Now lay that carpet out on your stage and unroll it. Align the center line marked on the stage with the center line already marked on the carpet. Be sure the carpet is flush with the back wall when you align it. Now, as you lay the carpet out you will see it has cutouts and is marked for character placement. In some cases it’s necessary to relocate the trap door. Check the layout of your trapdoor in relation to Uncle Klunk, his right foot, the table, and the guest chair. If any of the placement marks on the carpet interfere with the opening and closing of your trap door, then you will have to move it. Remove the door by simply unscrewing it at its hinges. Locate a point where you can fit the trap door where it will not interfere with Uncle Klunk and also a place where it will not interfere with Rolfe when he is returned to the stage. Take the door and lay it over its new location and, using a magic marker, outline it. Following the outline use a circular saw to cut out the new trapdoor. When you finish cutting the new trapdoor, pry it out using screwdrivers and a hammer. Don’t forget to move the oiler from the old trapdoor to the new one and screw it in place. Use the piece of plywood you’ve already cut out to re-cover the old trapdoor. Press it in place and then nail it. Use a 2x4 as a support piece for the new trapdoor and be sure to nail it in place as well. Next take the new trapdoor cover. And press it in place. Fasten it by screwing its hinges in place. Bring in the new carpet again, unroll it, and align the centering mark on the carpet with the center line on the back wall. Take the staple gun, and staple the carpet flush against the back wall. It is important that you staple only the back of the carpet at this time. Now trim the carpet around the radius of the stage. Also, around the drape motors and between stage right and center stage. Also be sure to trim the carpet for the new trapdoor and finish stapling the carpet in place. Now use vice grips to shut off the air by crimping the air line just before the oiler and install the show tapes and birthday tape that only use stage left and center stage using showbiz tape installation procedures. When you’re finished trimming around the trapdoor then staple the remainder of the carpet in place. This completes the pre-installation of Uncle Klunk.
[Klunk Installation]
Narrator:
This completes the preparation of the Klunk stage now it’s time to begin the actual installation process. Now, be sure to use the printed instructions and illustrations that you have received in addition to this videotape. Those materials will make the job as easy for you as possible. Let’s begin by taking inventory of the items contained within the two large plywood crates. First remove the packing list from the exterior of the crate marked the Klunk crate and put it aside for inventory until that crate has been unloaded. Now open the crate by unbolting and removing its front. Be sure to save all the nuts, bolts, washers, and plywood pieces that you collect as the crate is dismantled. The crate will be used again for storage when Uncle Klunk is dismantled at a later date so keep it in a safe place. Remove the contents of the crate carefully and as you proceed you will need to unscrew a shelf or two inside in order to get at all the parts. Also watch for Klunk’s valve bank and be careful not to crimp any of those lines. When you’re finished unloading the crate use the packing sheet you removed earlier to take inventory. Now as you take inventory, check all the parts and make sure none are missing or have been damaged in shipment. If any parts are missing or have been damaged be sure to call Creative Engineering Incorporated, Fred Quinlan is the man to talk to there. His number is area code 305-841-7900. Remember, call Fred if any parts are damaged or are missing. When you finish with the inventory of crate one, move on to the second crate. It’s labeled the chair crate. Again, collect the packing list from its envelope and then unbolt the crate as you did with the first one. Carefully remove the contents and put them aside for inventory. Again, as you proceed you will need to loosen and remove the shelving and protective bracing within the crate in order to get everything out. Again, be sure to take inventory and call Fred Quinlan if need be. Finally when you’re finished, dismantle both crates and put them and all the nuts and bolts and washers aside that you’ve collected for later use. Now that you have completed inventory and moved all the parts inside it is time to set up the ceiling accessories. First by installing the banner board. Remove the Rolfe and Earle valence first. Now carefully pull out the staples helping to hold it in place using a pair of pliers and then peel the valance away from its velcro fastener. When you remove the valence store it away for future use and remember, as the props for the Rolfe and Earle stage are taken down carefully pack them up for storage. This is the hardware you’ll be using to assemble the banner board, hardware number five. Fit the three bolts through one side of the banner board, now press the halves of the banner board together, add the necessary washers and nuts. The mounting board is now assembled and is ready for installation. Use hardware number three to mount the assembled banner board. With the help of an assistant, raise the banner board to the ceiling grid. Measure to ensure that it’s in precisely the right location and then drill the dirt irons provided into the grid structure of the ceiling and space them evenly throughout the entire length of the banner board. You may need to install an extension piece to your banner board if it doesn’t fit flush to your stage wall. Cut the extension piece from spare lumber as needed and fit it into place. Find a similar size piece of lumber and place it on top of the false ceiling, and fasten the extension piece as needed. Finally finish the job by attaching velcro to its front. Now it’s time to install the abomination mechanism and sign. But first, take a look at your printed instructions drawing 1a near the back for the details you will need in order to find the center point of the stage radius. Now after measuring and using a plumb bob to find that center line, install the sign mechanism support frame and use hardware number four for this. Begin by attaching a foot long 2x4 support piece to the drapery board directly above the center line. Now position the support piece about five inches behind the front of the drapery board. Next, attach a second foot long 2x4 directly on top of the first. When you’re finished with the front, install a third 2x4 support piece on the back wall above the ceiling tiles. This back support piece should be the same size as the two pieces in the front and should be attached at the same height as the top of the front support. Use three inch drywall screws to mount this final support piece into a stud on the back wall. This is a recommended installation and you may have to change this procedure for your particular stage. Now find the large eight foot long 2x4 and mount it on the smaller support pieces. Now make sure the support piece is on the radius center line, the abomination mechanism will be attached to it next, so check to make sure the support frame is in the proper position then fasten it down using drywall screws. Locate the aluminum abomination sign mechanism and then position it on top of the large wood support. When you’ve got it in the right place, attach weights to the side mechanism cables and allow them to hang freely. Now at this point you may find it necessary to trim pieces of the ceiling grid away to allow those cables to dangle uninterrupted. Now measure to see that those abomination mechanism cables are hanging six inches behind the banner board. Check this by measuring from the front of the board. Finally when you’ve determined the mechanism is on the center line and the lines are positioned properly, bolt the side mechanism onto the support piece using hardware number six. Now find the coiled airline and run it across the ceiling to the sign mechanism. Attach airline lead A to the front and airline lead B to the back of the sign mechanism. When you have completed attaching both leads of the airline, guide the remainder down the wall between the rain curtain and the curtain motor. Attach the air line to the wall using the tie rats provided in hardware 13. Drill a hole in the stage floor near the curtain motor and feed the airline through it. It will be attached later. Finally, finish the job by spray painting the airline at the stage back wall. Now move on to step E in the printed instructions to the installation of the Klunk banner. Center the banner onto the banner board and use the velcro in the front of the board and press it into place. Now as you install it, make sure it’s centered properly and all wrinkles have been removed. Finally, staple it into place for added security. Now it’s time to install the Uncle Klunk abomination sign. In order to complete this step you should use illustration 8B located in the back of the printed installation instructions. Use this hardware, and cut and crimp the cable length using the formula you have been given. Now be sure to make the cables of equal length so the sign will hang evenly. Now when you’ve got the sign hanging be sure to crimp the S hooks where they attach the side to the cables and springs, this will prevent the sign from accidentally falling onto the stage during a performance. Finally, check to see that your sign hangs evenly. This is the hardware you will need to hang the tv camera. Measure carefully and locate a position over the guest chair thirty four inches on center from the back wall. Now install two eye bolts in the ceiling twenty five and a half inches apart and use picture hanging wire to suspend the camera. Check that the front of the camera hangs 23 inches from the ceiling, and the rear 17 inches. When you’ve completed the tv camera installation locate your “on the air” sign. Now, if your apply sign face plate has not yet been changed over to the “on the air” face plate, then you will have to change it. Refer to drawing 9a in the printed instructions for the retrofit. When you’re ready to install the sign, measure to find the center of your stage back wall. Now attach two L brackets to your “on the air” sign and then attach the completed assembly to your back wall at the top of the curtain header. Now, once the sign has been installed, check to see that the rear curtain hangs freely. Also, locate the sign’s power cord and staple it to the back wall. Finish the job by plugging the sign in. You will be using these toggle bolts, part of hardware number seven, to install the cuckoo clock next. Begin by mounting the shorter leg of these l brackets to the wall. Now the brackets mount 52 inches above the stage floor measuring to the top of the bracket. Now space them 15 inches apart centered on the back wall center line and drill holes and then push the toggle bolts through. When you’re finished check to see that the brackets are level and secure. Locate the cuckoo clock and set it on the brackets; the power cord and air lines are located within the clock’s rear door so be sure to free them first. As you set the clock in its position check to see that it is one and a half inches away from the wall this will allow enough clearance for the rain curtain to hang freely. Also at this time, check to see that your clock is level. Now when the clock is positioned properly use the dirt irons from hardware number two and fasten it down. The air lines and power cord run straight down the back wall,l now be sure to use the wire ties to fasten them securely. Also you must drill a hole through the stage floor near the back wall, the air lines from the clock run under the stage here. Use flat black paint on the power cord and air lines and plug the cuckoo clock’s power cord in the outlet previously used by the red flood light. And finally, arrange the rain curtain so it hangs freely. You will be using these three inch drywall screws next to mount the “love mom” picture. Turn the picture over and put two of the drywall screws into the bottom corners of the picture frame. Now, the screw should just be visible at the front of the frame. This will allow the rain curtain to hang freely behind the picture. Now measure to install the picture forty one and one quarter inches from the center line to the left of the clock. Measure down eighteen and a half inches from the top of the rain curtain header. The third drywall screw should be installed at this point. Finally, hang the picture in position. Time to install this pee-wee spotlight. Begin by disconnecting the base of the spotlight and screw that base into the drapery board in the ceiling near the stage center line and reattach the spotlight. Now remove two green flood lights. Replace the flood light closest to the spotlight with a screw-in outlet receptacle. Now plug the spotlight into the receptacle. And then wire tie the dangling cord to the ceiling. Finally, aim the spotlight at the cuckoo clock and lock it into position. Now it’s time for you to begin the installation of robot Klunk himself. Begin by disassembling Klunk’s disconnect on his valve bank. When the disconnect comes apart, use masking tape to cover both ends; this will keep the o-rings in place and will keep any dirt or debris out. Unbolt Uncle Klunk from his dolly and put the dolly aside for later use. Now, with the help of an assistant or two, carry Uncle Klunk on stage. Klunk will fit nicely over the cutout in the carpet. This is the hardware needed to bolt Klunk to the stage floor. Now use a one-quarter inch drill bit to drill out pilot holes in the floor. If you happen to drill into a joist make note of it and use light bolts instead of through bolts. When you finish drilling with a larger 3/8 inch drill bit the second time around, bolt Klunk to the stage. In order to make the next step easier, disconnect Klunk’s aluminum right foot from his leg. Now place the foot over the mark on the carpet and drill out the four holes. Now reassemble the foot and the leg and locate Klunk’s rubber tennis shoe and the fiberglass insert. Place Klunk’s right foot over the insert and shoe, and then bolt it all onto the floor. Now move to the back of the chair in order to clear a three inch wide hole in the stage for the plumbing harness to pass through. Here two smaller holes were drilled side by side. As you pass the plumbing harness through be careful not to crimp any of the air lines. When you’re finished, be sure to wire tie those air lines to the base of Klunk’s chair. Before going beneath the stage to hook Klunk up, locate the table and guest chair. Drill and bolt them into position in the same manner as you did with Uncle Klunk. Now, hand Klunks valve banks beneath the stage there you will reconnect them to the quick disconnects that are waiting. Now carefully remove the masking tape you put on to keep the dirt out and the o-rings in place. Now check to see that every o-ring is still there and then reconnect the quick disconnects and the valve banks. And as you do this be certain the air lines are aligned properly. When you have finished, locate the airlines for the abomination sign and the cuckoo clock also find the main airline. Now connect them to the valve bank according to the printed instructions. When this is complete you may air up the show. Now be sure you check for possible leaks when you turn the air on. Locate the Klunk controller and place it into position underneath the stage through the trapdoor. Locate the two output ribbon cables attached to the controller and plug them into the interface as shown. The lower cable, J3, attaches to the left-hand board movements one through 15. The upper cable, J2, plugs into the right-hand board movement 16 through 30. Now find the 60 foot RCA phono cable and plug one end into the phono jack connector on the computerized tape reader board inside the controller. After closing the controller doors, run the funnel cable back to the wall into the control room, any excess cable should be left under the stage. Now at this point turn the controller off and then plug it into the extension cord. Now run the extension cord up through the stage near the center line and then plug it into the outlet on the back wall. Also be sure to tack down the carpet with a stapler and then paint the extension cord flat black. Now move into the control room in order to complete the controller hookup. Locate the Y phono connector you have been supplied with and plug it into the number three output on the top deck. Here’s a close-up repeat of what you need to do. The 60-foot RCA phono cable that you plugged into the computerized tape reader board and the Klunk controller should now be plugged into one female jack of the Y connector. Plug the existing phono plug into the other jack. Now turn on the power switch of the Klunk controller and check to see that the two recessed leds in the upper right hand corner of the front of the box are on. The upper led indicates the 5 volt power supply is on the lower one the 24 volt power supply. Wheel out your video test equipment so you can see the monitor and clock at the same time and connect the eight foot RCA phono cable provided for the Klunk VCR from the audio output number two on the VCR to the jack on the computerized tape reader board inside the controller. Locate your adjustment tape and turn on your video tape deck and then load the tape. Make sure it’s rewound. Now run the warm-up section of the tape. Klunk will go through each movement separately. As he does check Klunk and the props for any obvious air leaks for defects or damage. Now it’s time to dress Klunk and the stage. Begin by locating and installing the decorative bases for the table and the chairs. Now set the flower base on the cuckoo clock pedestal. Lay out Klunk’s clothes on stage next and yes his bow tie too. Begin dressing Klunk by fitting his shirt and carefully snapping it in place using the fasteners provided. Now it’s important that all velcro and snap fasteners be secured but also that Klunk move freely. So when you’ve dressed him see that he moves freely without hindrance of his clothing. Your completely outfitted Uncle Klunk should look like this. Using the video adjustment tape you have, run the Klunk “set phone” program. The “set phone” section will start its cycle by first leaning Klunk’s chair back then moving his arm into position. After his arm is in position Klunk’s wrist and thumb will cycle five times and then repeat the whole cycle again. The cycle will continue repeating until the set phone section of the tape is over. If you need more time, rewind it to the beginning of the set phone section and repeat the cycle. Position the phone stand so Klunk’s thumb is centered between the V blocks. When you’ve done that, adjust the stand height. Now make sure the phone fits squarely into the palm of Klunk’s hand when it’s in the down position. When you have Klunk picking up and setting down the phone correctly, tighten the adjustments on the phone stand and secure it to the table using three quarter inch dirt irons. Now to avoid damaging Klunk’s arm and hand, don’t stop the videotape unless Klunk is leaning forward and his arm is away from the table. Now finally remove the V blocks from the phone stand and install the phone cover over the stand. When you’ve got it in place, bolt the V blocks to the phone stand. Run the “set banana” section of the video adjustment tape next and use the same procedure for setting up the banana as you did for the phone. When you’ve got the stand into position, fasten it into place. And then slide the base over the stand. Be sure to remember to stop the video tape player only when Klunk is in a static position during the cycle. Finally it’s time to video test Uncle Klunk and the props. Run the video test section of the adjustment tape. View the tape long enough to correctly determine that the movement is truly out of adjustment. The video display and character must be synchronized exactly. If a movement is in question, isolate the valve in the valve bank that operates the movement. Manually operate the valve by pressing the white manual override button on the valve solenoid. Observe the movement by operating it manually. Look for a smooth operation of the movement in question. Check for cosmetic parts that are binding. If the movement is truly out of adjustment, proceed with the flow control adjustments. Now adjust spotlights number seven and number eight number eight should be directed at Uncle Klunk and number seven at the table top telephone and fruit vase. Also double check to see that the peewee spotlight is aimed at the cuckoo clock. Finally, as a part of preventive maintenance you will need to check Uncle Klunk’s critical adjustments periodically. Now you’ve been provided with a complete manual on all of Klunk’s critical angles in order to keep Klunk functioning properly. Strict adherence to the angles and tolerances is a must. It’s all finished! And thanks to your hard work your Uncle Klunk should be performing as well as the most carefully installed in the entire showbiz pizza place chain of restaurants! Congratulations. Stay tuned for a look at the Santa Claus stage . [Footage show the Santa Claus Klunk retrofit stage]
Last updated on: Nov. 24, 2025
Search for: "Uncle Klunk Installation Tape" on the forums!

